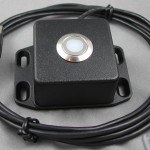
Bluetooth buttons work with desktop computers and mobile phones. Delcom’s Bluetooth buttons can connect to a computer, tablet, phone, or any device that supports Bluetooth, and can be set up to send keycodes to the paired device. See Delcom’s Bluetooth devices.
Quick Instructions
Determine which ePanicButton button/message you want to activate using the USB button; copy down its hotkey combination (for example, Ctrl+Shift+A).
For a single button, edit Button number 1 to match your copied ePanicButton hotkey combination.
For Type, select Keyboard.
For Action, select Momentary.
For Code, select the key that you desire (example: F9, F3, L, etc.).
For Mode, enter the modifier key(s) (example: Ctrl, Shift, Alt — multiple possible).
Select Program Device to program the hardware button. You can also test it first by setting it to some letter or number such as “G” and then “typing” the letter in a word processing program or Notepad by pressing the USB button.
Finished. The USB button can be unplugged and used anywhere. When pressed it will do the same as whatever hotkey combination you programmed it to perform.
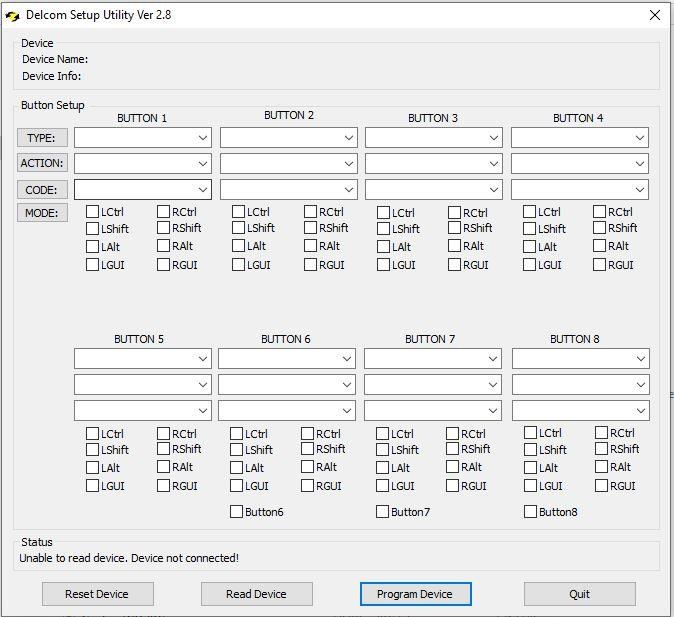
The Delcom Setup Utility (version 2.8), as shown in the PDF instructions.
Overview
To have a hardware button activate ePanicButton, simply configure the alert buttons on the web-based administrative portal so the desired hotkey combination matches the USB button hotkey combo.
ePanicButton USB optional hardware buttons are programmed to mimic or copy a keystroke (or keystrokes) on the computer keyboard. For example, if the USB button is programmed to be “Ctrl + F4,” pressing the USB button is the same as pressing those keys on your keyboard. If your “Support” ePanicButton is set for those keystrokes as well, it will be activated.
A hardware button can only activate one ePanicButton alert. Once you program the USB button using the button configurator, you can unplug it and use it on any computer (same with the receiver for the wireless buttons).
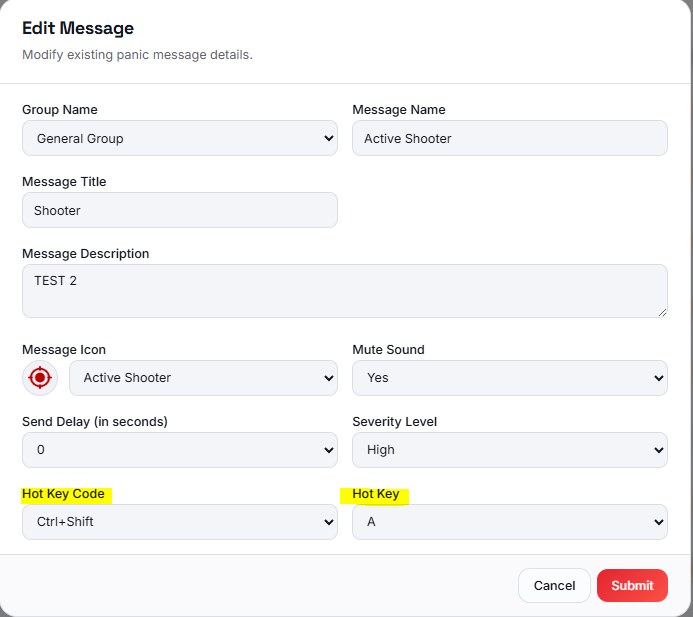
Select and edit the ePanicButton “button” to be activated by the hardware button (pencil icon to edit).
Change the Hotkey to whatever combination you desire (below is an example set to Ctrl+Shift+A).
Test the hotkey combination by using your keyboard. Remember to update the computer by right-clicking the icon in the notification tray and selecting “Update”.
This image may be slightly different from the current portal but the fields are the same.
Example of editing a message hotkey in the admin portal, set to Ctrl+Shift+A.
Delcom Products USB Buttons
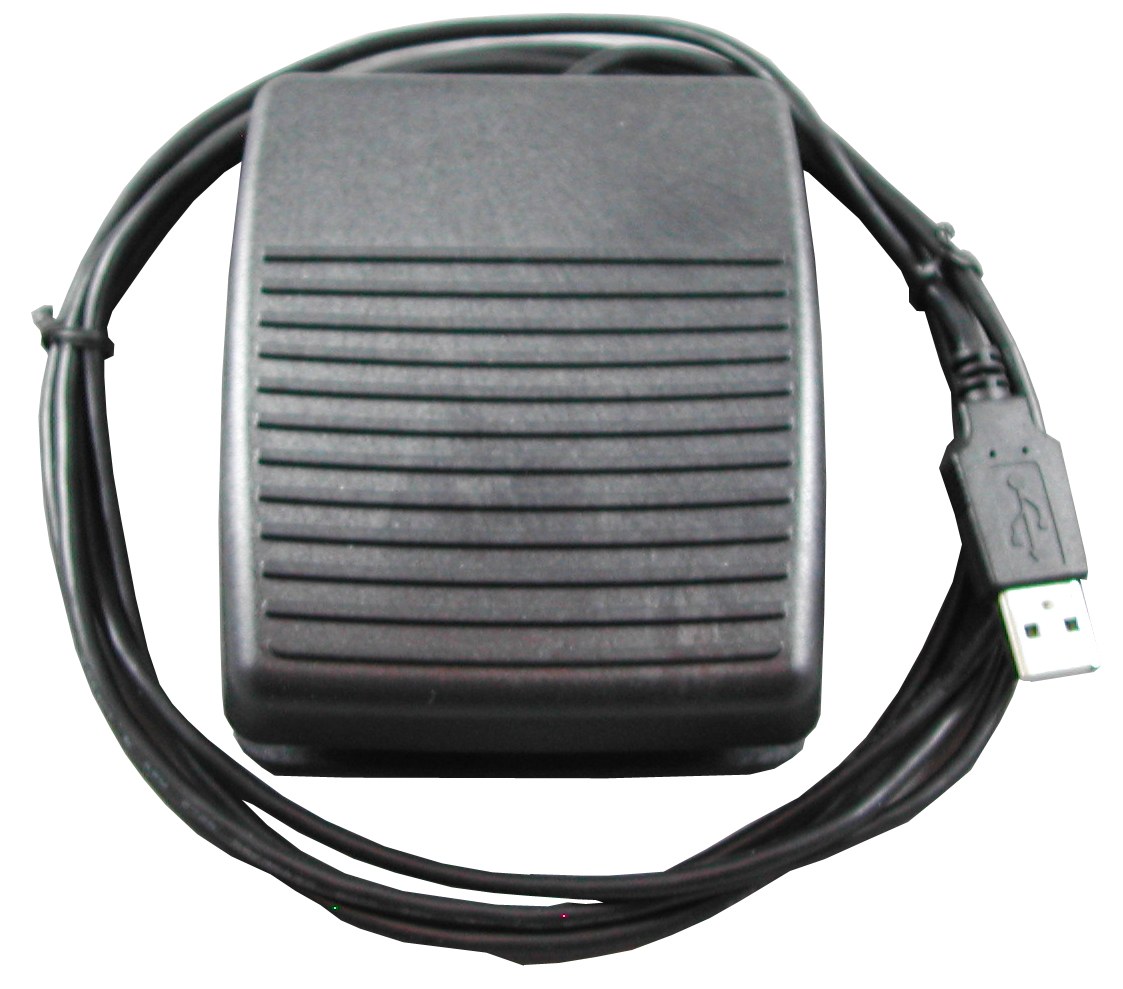
These are just a few examples. Delcom offers many other styles of buttons, including wireless and Bluetooth options that work with desktop computers and mobile phones. Browse the full range at Delcom, or see their Bluetooth devices.
These USB buttons can be configured to any hotkey combination. Set your ePanicButton “buttons” to the desired hotkey combos in the Web Admin Portal. For example, set “Help” to Ctrl+Shift+A. You can test if the hotkey combination works by setting it off by using your keyboard before you program the hardware button. The idea is that the USB button will be programmed to the same hotkey combination. Remember to update the computer with any changes made on the Admin page by right-clicking the icon in the notification tray and selecting “Update”.
Plug the hardware button into a USB port and the driver should automatically install.
Install the setup utility and it should launch (see the screenshot in Quick Instructions above).
Under Button 1, enter these settings (more info about these by clicking the boxed term):
For Type, select Keyboard.
For Action, select Momentary.
For Code, select the key that you desire (example: F9, F3, L, etc.).
For Mode, enter the modifier key (example: Ctrl, Shift, Alt — multiple possible).
Select Program Device to program the hardware button. You can also test it first by setting it to some letter or number such as “G” and then test “typing” the letter in a word processing program or Notepad by pressing the button.
Finished. The USB button can be unplugged and used anywhere. When pressed it will do the same as whatever hotkey combination you programmed it to perform.
If you select a USB hardware device with multiple buttons, the setup utility lets you set up one up to 8 buttons. To program multiple buttons: go from left to right, 1 to X. You can also use this test app to see which switch is which: https://www.delcomproducts.com/productdetails.aspx?ProductNum=890607.